Skip to content
 I face many concerns when planning a sauna installation at home. These concerns often slow down my progress and create uncertainty. To move forward with confidence, I need a clear and structured approach that ensures safety, durability, and efficiency.
Installing a sauna at home requires careful planning, correct materials, proper electrical work, and effective moisture control. When these elements are handled correctly, the sauna can deliver stable heat, long-term durability, and a safe user experience.
Quick Answer: How to Install a Sauna at Home?
Installing a home sauna requires proper planning of space, electrical setup, insulation, ventilation, and moisture control.
A successful installation includes:
- Choosing the right location
- Ensuring safe electrical wiring by a licensed electrician
- Installing insulation and a vapor barrier
- Selecting the correct heater size
- Building proper ventilation and drainage
Step-by-Step Sauna Installation Guide
Step 1: Choose the Location (Space Planning)
Select a dry, stable, and well-ventilated space with access to power.
Step 2: Plan Electrical Requirements
A sauna requires a dedicated circuit. Always use a licensed electrician.
Learn more about sauna electrical requirements1.
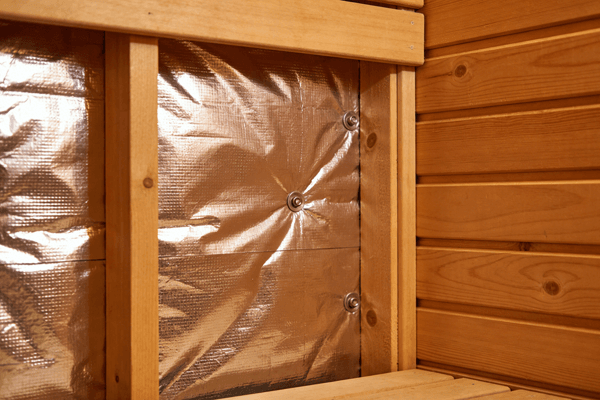
Step 3: Install Insulation & Vapor Barrier
Use high-temperature insulation and aluminum foil vapor barrier to prevent heat loss and moisture damage.
Step 4: Build Interior Structure
Use heat-resistant wood such as cedar or hemlock.
Step 5: Install Sauna Heater (Critical Step)
Select heater size based on room volume (m³).
👉 Learn more: Sauna heater guide2
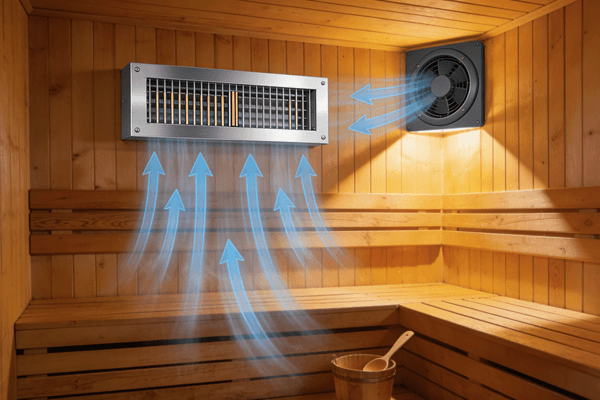
Step 6: Install Ventilation System
Air inlet near heater + outlet near ceiling.
Step 7: Flooring & Drainage System
Use tile, concrete, or treated wood.
Step 8: Final Testing & Safety Check
Check heat, airflow, and electrical safety.
Sauna Installation Requirements (What Top Pages Include)
1. Space & Volume Requirements
- Minimum space: 3–5 m³ (small sauna)
- Larger sauna: 6–13 m³
👉 Important: heater must match room volume.
2. Sauna Heater Sizing (SEO Gap Filled)
| Room Volume (m³) | Heater Power (kW) |
|---|---|
| 3–5 m³ | 3–4.5 kW |
| 6–9 m³ | 6 kW |
| 10–13 m³ | 8–9 kW |
👉 This is a high-ranking keyword factor (many competitors include this).
3. Electrical Requirements
- Dedicated circuit
- Ground-fault protection
- Proper voltage (120V / 240V depending on heater)
⚠️ Always use a professional.
4. Ventilation Requirements (Ranking Signal Boost)
Proper ventilation:
- Maintains oxygen levels
- Prevents overheating
- Reduces moisture damage
5. Moisture Control & Vapor Barrier
Install a vapor barrier to:
- Prevent mold
- Improve heat efficiency
- Protect structure
What Should You Consider Before Installing a Sauna?
Key factors include:
- Power supply
- Space size
- Moisture control
- Local regulations3

How to Choose the Right Sauna Location
Best options:
- Basement
- Bathroom
- Spare room
Requirements:
- Low humidity
- Structural strength
- Power access
For high-quality, project-ready solutions, you can also explore our outdoor sauna options designed for durability and commercial applications.

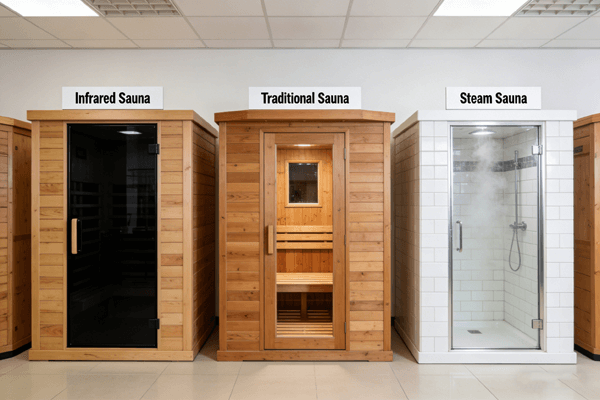
Sauna Types (Search Intent Expansion)
| Type | Heat | Energy | Use Case |
|---|---|---|---|
| Traditional | High | Medium | Classic sauna |
| Infrared | Low | Low | Energy saving |
| Hybrid | Mixed | High | Premium setup |
Learn more:
👉 Infrared sauna benefits4
Sauna Safety Dos (High-Ranking Section)
- Use certified wiring
- Maintain ventilation
- Use heat-resistant wood
- Follow clearance guidelines

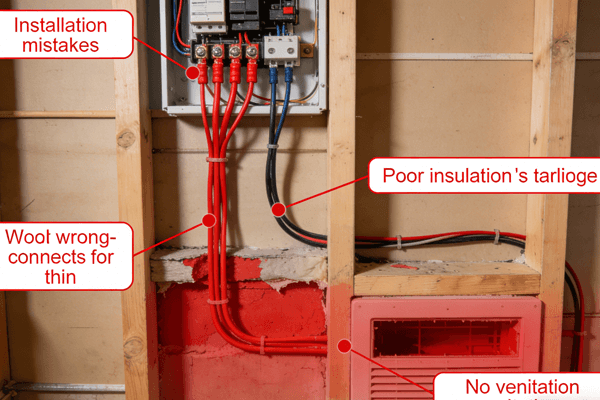
Sauna Installation Mistakes to Avoid
- Wrong heater size
- Poor insulation
- No vapor barrier
- Poor airflow
- Unsafe wiring
DIY vs Professional Sauna Installation
| Task | DIY | Professional |
|---|---|---|
| Assembly | Yes | Optional |
| Wiring | ❌ | ✔ Required |
| Ventilation | Maybe | Recommended |
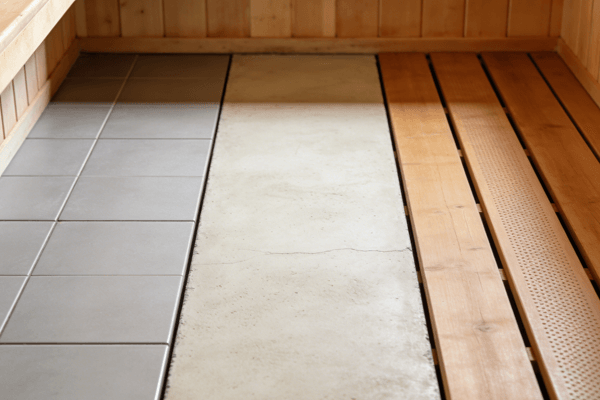
Sauna Flooring & Drainage Requirements
Best materials:
- Tile
- Concrete
- Treated wood
Drainage:
- Floor slope
- Drain outlet
- Air drying
Sauna Cost Breakdown
- Prefab: $3,000 – $8,000
- Custom: $8,000 – $25,000+
Factors:
- Materials
- Heater
- Labor
- Electrical work
Maintenance After Installation
- Clean regularly
- Check heater stones
- Maintain airflow
- Dry after use
FAQ (Structured for SEO)
How long does sauna installation take?
Prefab: 1–3 days. Custom: several weeks.
What is the lifespan of a sauna?
15–25 years with proper maintenance.
Do I need a permit?
Often yes—check local regulations.
Why Proper Installation Directly Impacts ROI
A well-installed sauna improves:
- Energy efficiency
- Equipment lifespan
- User experience
- Maintenance cost
For commercial projects, correct installation directly affects long-term return on investment.
Conclusion
Installing a sauna at home requires proper planning, correct materials, and safe electrical installation.
By following these steps—especially heater sizing, ventilation, and moisture control—you can build a sauna that performs efficiently and lasts for years.
-
Sauna Electrical Requirements – https://saunasupplyco.com/sauna-electrical-requirements-whats-required/ ↩
-
Sauna Heater Guide – https://thesaunaheater.com/blogs/sauna-academy/the-ultimate-guide-to-choosing-the-right-type-of-sauna-heater-for-your-home?srsltid=AfmBOornBuYx-So6ImZRuS6yFPsCcnPeunThj9JXPIFLmhy3Ksj3LmIz ↩
-
US Home Sauna Regulations – https://finnishsaunabuilders.com/blogs/sauna-culture/us-home-sauna-regulations-essential-guidelines-for-homeowners?srsltid=AfmBOoqD5N5EaEN_5e9tEHV2o5rOS7_SY2DNbhMoJd_QHzr8XPCNe6SC ↩
-
Infrared Sauna Benefits – https://www.mayoclinic.org/healthy-lifestyle/consumer-health/expert-answers/infrared-sauna/faq-20057954 ↩